

Updated Oct 8, 2015. Hi #iBAConf!
It is way simple to directly export your animation to an iBooks Author widget:
- File > Export > Dashboard / iBooks Author
- Drag the generated .wdgt file into iBooks.
- Done!
As of Tumult Hype 1.5 (February of 2012) Hype has supported widget creation. The below explanation is for version 1.0.5, but may be an interesting read if you’re interested in the technical workings of iBooks widgets.
As you may have heard, iBooks Author uses the Dashcode HTML widget format for embedding HTML, so any HTML within that format can be embedded in a book. Placing your HTML within the dashcode format is pretty quick. You won’t be needing Dashcode, since we’ve prepared some of the required files (like info.plist) for this purpose. This is the general workflow:
Hype Export → Create a Widget → iBooks Author → HTML5 Animations within iBooks!
To get started, you’ll need a Tumult Hype exported document and iBooks Author.
Note: Your exported Hype document should be 1024 width × 648 height or smaller. This is the area of the widget space. Any size larger than this will be scaled down. Sizes smaller than this will produce a centered element in the widget preview space.
Creating a .wdgt file from a Hype export Folder
- First, export your Hype document and make sure you have both ‘Also Save .html’ and ‘Create Enclosing Folder’ options checked. If you name your file ‘index’ then you will need to make fewer changes.
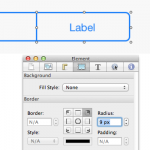
- In the folder you’ve just created, add the file ‘Info.plist’, which you can get from our set of demo files here. Open that file with a text editor, and match up the name of your .html file to the value under the ‘MainHTML’ area. You’ll also need to match the width and height of your document. You can find your document size in the ‘Document Inspector.’
- Set a preview image for your widget by adding an image named ‘Default.png’ to this folder. A quick way to do this is to go to your first scene, take a screenshot by pressing command+shift+4, and then click and drag over your scene area. This generates a PNG on your desktop which you can rename and move into place.
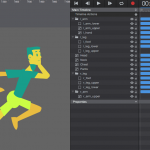
- Now that you have Info.plist in order, and a default image, your folder structure should look like the image below. The final step to create your widget is to rename the folder that contains those files to have .wdgt at the end.

Importing your Widget to iBooks Author
 To add your Hype document to a book in iBooks Author, go to the page where you’d like to place it, then click ‘Widgets’ > HTML. It’s best to be in ‘Landscape’ mode to do this. You’ll then see a new widget and a file button in the inspector where you can select the widget you just exported. You’ll notice that your ‘Default.png’ image is the placeholder for your animation. To preview your widget, click on it, then click ‘Edit HTML’. To see it on your iPad, plug it into your computer, then click the ‘Preview’ button.
You’ll notice that your animation will place once, so depending on the effect you’re going for, you may want a ‘replay animation’ button for your users.
That’s it! You now have an HTML5 animation within a book ready for iTunes.
Please note that the above article is a bit of history. For the most up-to-date information on widget creation, visit our forums.